The Art of Applying Custom Heat Transfers: 5 Essential Tips
When it comes to customizing garments, custom heat transfers offer a versatile and cost-effective solution. Whether you’re creating personalized t-shirts, sports uniforms, or promotional items, applying custom heat transfers requires precision and attention to detail. To help you achieve flawless results every time, we’ve compiled five essential tips for applying custom heat transfers. By following these guidelines, you can ensure that your designs adhere smoothly and beautifully to the fabric, creating a professional and long-lasting finish.
Prepare the Surface
- Before applying any custom heat transfer, it’s crucial to prepare the surface properly. Be sure the upper heating platen is completely flat. Use a T-square to be sure the surface is completely flat with now curves. Be sure the lower platen is made of heat resistant rubber and free of any holes or missing areas on the surface. This will allow even pressure to be applied on both upper and lower platens. Pre-press the garment using a heat press to remove any moisture and wrinkles. This step ensures a smooth surface for the transfer and minimizes the risk of imperfections.
Choose the Right Heat Transfer Method
- There are various methods available for applying custom heat transfers, including using a heat press, an iron, or even a home oven. The most reliable and efficient method is by using a heat press machine. A heat press allows for precise temperature and pressure control, ensuring optimal adhesion and durability of the transfer. If you’re working on a larger scale or have frequent heat transfer needs, investing in a quality heat press is highly recommended.
Be sure you check any reviews regarding the quality of the machine. It is extremely important the heat press has a pressure adjustment. Not all heat press machines are the same. Many look like an industrial style heat press, but lack the necessary parts to ensure you will have enough heat and pressure to make your custom heat transfers apply properly. Make sure the lower platen is made of heat resistant rubber. Some heat press machines use a low grade foam which is covered with fabric. This will not produce sufficient pressure to allow the custom heat transfer to bond properly to your fabric.


Test, Test, Test
- Before applying your custom heat transfer to the final garment, it’s crucial to conduct a test run. Cut a small piece of the transfer and apply it to a similar fabric using the same heat press settings you plan to use. This test allows you to assess the transfer’s adhesion, color vibrancy, and any potential issues that may arise during the application process. Make sure to wash and dry the test piece according to the transfer manufacturer’s instructions to verify its durability. Adjust your settings if necessary before proceeding with the actual application.
Many people talk about “The Dollar Bill” test, which suggests placing a dollar bill on each corner of the heat press machine, then locking down the upper platen. If you can pull out the dollar bill without tearing it, you need to add more pressure. If your transfer does not release all of the ink on the fabric, this can be attributed to insufficient pressure. You may see this around the corners of the custom heat transfer as well as around areas of text.
Positioning and Alignment
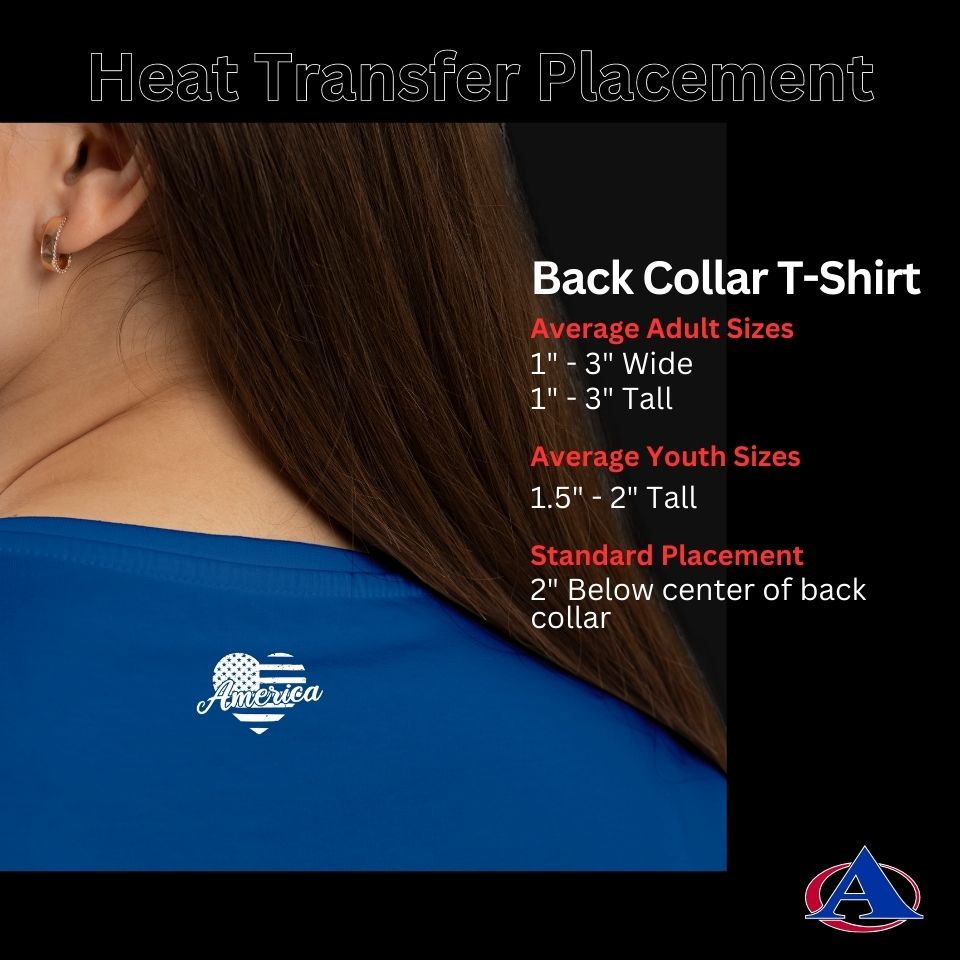
- Proper positioning and alignment of the custom heat transfer play a significant role in achieving a professional look. Use measuring tools like rulers or tape to ensure accurate placement. Mark the desired position with a washable fabric pen or tailor’s chalk. If you’re working with multiple transfers, lay them out on the garment before applying to ensure proper spacing and alignment. Once positioned, secure the transfer in place using heat-resistant tape to prevent shifting during the application process. Choose custom heat transfers which use a clear release film. This is the best type of heat transfer because it allows you to see the image as it is placed on top of the garment vs other types of transfers which print on paper.
Apply the Right Amount of Heat and Pressure
- The key to successful heat transfer application lies in finding the right balance of heat and pressure. Consult the instructions provided by the transfer manufacturer for the recommended temperature and pressing time. If using a heat press, set the temperature according to the fabric type and transfer specifications. Apply even pressure using the heat press machine or iron, ensuring that the transfer receives uniform heat distribution. Avoid applying excessive pressure as it may cause the transfer to blur or distort. After the pressing time elapses, follow the custom heat transfer manufacturers instructions to determine if the transfer should be peeled hot, warm or cold. Keep in mind, custom heat transfers do not apply to all substrates. Most heat transfers will apply to 100% cotton and cotton blends. Not all transfers work on 100% polyester. It’s important to note that temperatures may need to be lowered if your custom transfer manufacturer states the product will apply to heat sensitive fabrics such as polyester.
How to Make Heat Transfers?
Creating heat transfers is quite an easy and straightforward process. The main steps include:
- Choosing the design that you want to transfer.
- Printing the design onto heat transfer paper.
- Prepare the fabric by smoothing out any wrinkles and pre-pressing the fabric for a heat press to remove all moisture.
- Position the transfer paper with the design face down on the fabric and apply heat with a heat press iron to transfer the design.
Afterward, let the fabric cool slightly and remove the transfer paper. But, before proceeding with any of these steps, make sure to assess the fabric and design to determine the time, pressure, and heat settings needed for a successful transfer.
How to Heat Press a Shirt with Transfer Paper?
In order to heat press a shirt with transfer paper, first make sure to heat the heat press. Afterward, position the shirt and ensure it is smooth. Then, place the transfer paper on the shirt and use heat-resistant tape to secure its position. Finally, you should apply heat and pressure and then peel off the transfer paper.
Polyester Heat Press Temp and Time
When it comes to heat transfers on polyester fabric, make sure to follow the correct temperature and time instructions. The temperature should be set around 270-300°F, and the press time should be around 10-15 seconds.
100% Cotton Heat Press Temp and Time
For optimal results using a heat press on cotton, you will need different settings. The temperature should be set around 320-350°F, while the press time should be around 15-20 seconds.
FAQs: Frequently Asked Questions about Iron-On Transfers
How to apply iron-on transfers?
To apply an iron-on transfer, follow these steps:
- Preheat your iron to the recommended temperature (typically 320-350°F for cotton).
- Place the garment on a flat, heat-resistant surface.
- Position the transfer design face down on the fabric.
- Apply firm and even pressure with the iron for the specified time.
- Allow the transfer to cool slightly before peeling off the backing.
How to get iron-on transfers to stay?
For long-lasting iron-on transfers, consider these tips:
✔ Use the correct temperature and pressure – Follow the manufacturer’s instructions carefully.
✔ Pre-wash the fabric – Avoid fabric softeners, as they can reduce adhesion.
✔ Apply even pressure – Use a heat press or a firm, consistent ironing motion.
✔ Peel at the right temperature – Some transfers require hot, warm, or cold peeling for best results.
✔ Wait before washing – Allow at least 24-48 hours before the first wash.
How to do iron transfers at home?
You can create and apply iron-on transfers at home using these simple steps:
- Design & print: Print your image onto heat transfer paper using an inkjet printer.
- Prepare the fabric: Lay the shirt flat and remove any moisture by pre-ironing it.
- Position the transfer: Place the printed transfer on the fabric, aligning it carefully.
- Apply heat: Press firmly with an iron or a heat press for the recommended time.
- Peel & set: Allow the transfer to cool before carefully peeling the backing paper.
How long do you leave iron-on transfer on?
The duration depends on the type of fabric and transfer material, but generally:
- Cotton: 15-20 seconds at 320-350°F
- Polyester: 10-15 seconds at 270-300°F
- Blends: Adjust based on the dominant fabric type
Always check the manufacturer’s heat press settings for the best results.
Conclusion
By following these five essential tips for applying custom heat transfers, you can elevate your customization game and achieve flawless results every time. Remember to prepare the garment surface meticulously, choose the right heat transfer method, conduct test runs, focus on positioning and alignment, and apply the appropriate amount of heat and pressure. With practice and attention to detail, you’ll be able to create stunning custom garments that leave a lasting


