Heat transfer designs offer a simple and cost-effective way to customize apparel with your own unique artwork. Whether you are a small business owner looking to add custom branding to your merchandise or an individual looking to personalize a t-shirt, DTF jersey or hoodie, you can easily design your own heat transfer to achieve your vision.
But how do you create a custom heat transfer design? In this article, we’ll guide you through the steps to create your own design and offer some tips and best practices for beginners. We’ll also explore the benefits of different methods and what file types you need to get the best results.
Benefits of Heat Transfer Designs
Before we dive into the steps to create a custom heat transfer design, let’s take a look at the benefits of this popular customization method.
- Versatility: Heat transfer designs can be applied to a wide range of materials, including cotton, polyester, and even spandex. They can also be applied to a variety of products such as clothing, bags, hats, and more.
- Cost-effective: Heat transfer designs can be more cost-effective than other methods such as screen printing, especially for smaller orders.
- Quick turnaround: With heat transfer designs, you can create custom designs and have them applied to your apparel quickly, often in just a few hours.
- Full-color designs: With advances in technology, heat transfer designs can now accommodate full-color designs and photographic images.
Steps to Create a Custom Heat Transfer Design
Now that we’ve discussed the benefits of heat transfer designs, let’s take a look at the steps you need to follow to create your own design.
Step 1: Choose Your Heat Transfer Designs Software
The first step in creating a custom heat transfer design is to choose the right design software. If you are new to graphic design, consider using user-friendly software such as Canva or Adobe Spark. If you have experience with design software, you may want to use more advanced programs such as Adobe Illustrator or CorelDRAW.
Step 2: Choose Your Heat Transfer Designs Size
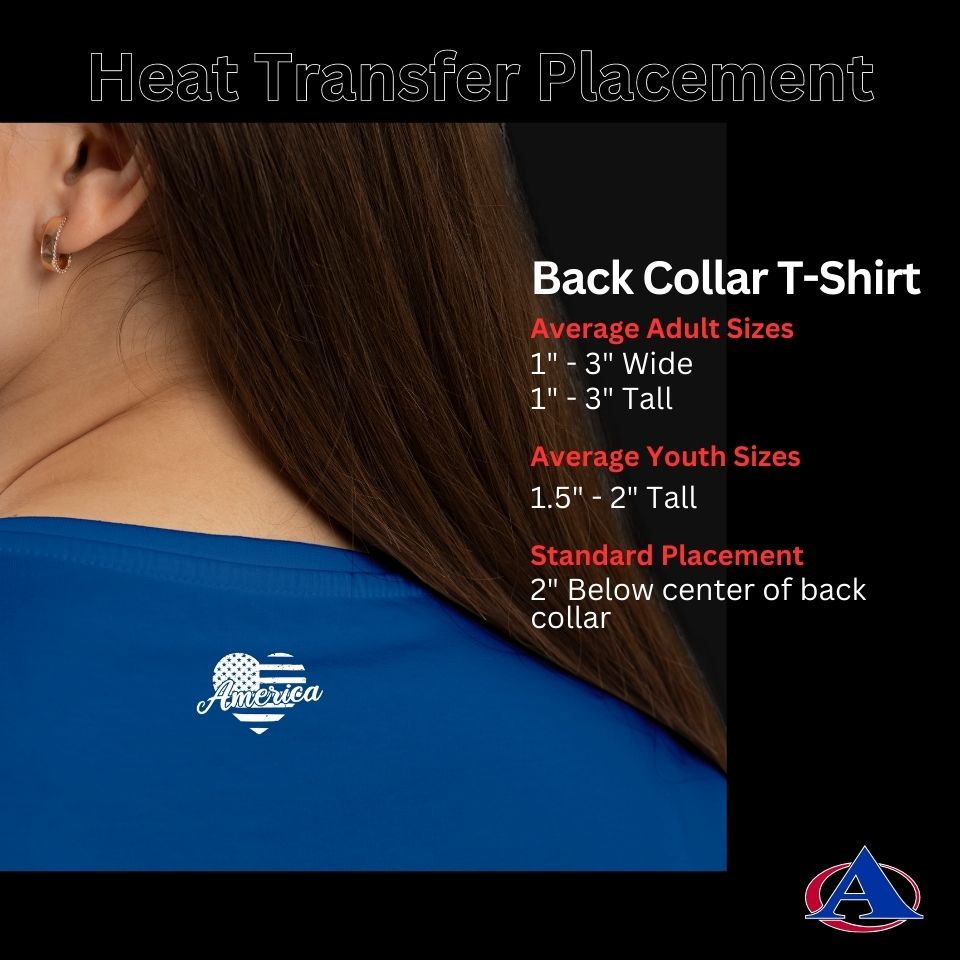
Determine the size of your design and the placement on the apparel. The size and placement of your design will affect the final cost and the type of heat transfer paper you will need to use.
Step 3: Choose Your Colors
Decide on the colors you want to use in your heat transfer designs. If you want full-color or photographic images, you’ll need to use a printer that supports CMYK (Cyan, Magenta, Yellow, and Key/Black) ink.
Step 4: Create Your Heat Transfer Designs
Create your design using your chosen software. If you are using vector artwork, ensure that your design is in a vector format, such as .AI or .EPS. Vector files can be scaled up or down without any loss of quality.
Step 5: Print Your Heat Transfer Designs
Print your design onto the appropriate heat transfer type. For high quality full color heat press transfers, the most popular option is Ultra Ink™. This type of heat transfer is easy to use, cost-effective, and can be used with most heat press machines.
Step 6: Cut Your Heat Transfer Designs
Once you’ve printed your design, cut it out carefully. If your design has any intricate details, be sure to take your time and cut them out accurately.
Step 7: Prepare Your Apparel
Prepare your apparel by pre-washing and drying it to remove any sizing or residues that may interfere with the transfer process. If your design is going onto a shirt, be sure to place a piece of cardboard inside the shirt to prevent any ink from bleeding through to the other side.
Step 8: Apply the Heat Transfer
Follow the instructions provided with your heat transfer film to apply the design to your apparel. Typically, this will involve using a heat press to apply heat and pressure to the transfer paper, which will cause the design to adhere to the fabric. Be sure to follow the manufacturer’s instructions for the specific type of transfer paper you are using.
Step 9: Test Your Design
Once you have created your custom heat transfer design and applied it to your apparel, it’s important to test the design to ensure that it looks the way you intended and that it will hold up over time. This can be done by washing and drying the apparel as you normally would, and then examining the design to ensure that it has not peeled, cracked, or faded.
If you notice any issues with the design, you may need to make adjustments to your design or your application process. It’s important to remember that creating high-quality custom transfers designs takes time and practice, so don’t be discouraged if your first few attempts don’t turn out perfectly.
Step 10: Consider Outsourcing
If you don’t have the time, equipment, or expertise to create personalized heat transfers in-house, you may want to consider outsourcing the work to a professional printing company such as Apex Transfers. This can be a cost-effective and efficient way to get high-quality personalized heat transfers for your apparel business, without the need for expensive equipment or extensive training.
When outsourcing your custom heat transfer design work, be sure to choose a reputable and experienced printing company that uses high-quality materials and can provide you with a range of customization options. You may also want to consider working with a company that offers design services, so that you can ensure that your custom heat transfer designs are professional, high-quality, and effective.
Conclusion
Personalized heat transfers are an excellent way to create unique, eye-catching designs for your apparel business. Whether you are a beginner or an experienced designer, following the steps outlined in this article can help you create custom heat transfer designs that are high-quality, durable, and effective.
Remember to choose the right design software, select the best file types, use the right materials and equipment, test your design, and consider outsourcing if necessary. With a little practice and patience, you can create custom heat transfer designs that will set your apparel business apart and help you achieve your marketing and branding goals.


